Logo
v1.3.31
Games
Lantern
Loadout 1

A.Mod w/ Shield Roll + Distorted Components Setup

Descendant Modules

Skill, Sub and general Modules
Stats for  Assassin's Resolution
Max Shield
Skill Critical Hit Damage
Fusion Skill Power Boost Ratio
Dimension Skill Modifier
All weapon loadouts for this setup
Blue Beetle Impact Rounds
Blue Beetle
Scout Rifle
Free Augmentation Firepower Augmentation Attribute Augmentation Tactical Augmentation Precision Augmentation
Lvl
Free Augmentation Grappling Hook Charge Time Increase Ratio Precision Augmentation Sprint Speed

Reactor & External Components

Reactor, External Components and Item sets
Tingling Mixture Reactor
Reactor
Skill Cooldown Skill Critical Hit Damage
Distorted Resolve Sensor
Sensor
Recovery Augmentation Defense Augmentation
Distorted Resolve
Recovery Augmentation Max HP Defense Augmentation DEF Max MP MP Recovery In Combat
Distorted Resolve Memory
Memory
Recovery Augmentation Defense Augmentation
Distorted Resolve
Recovery Augmentation Max Shield Defense Augmentation DEF DEF MP Recovery Modifier
Distorted Resolve Processor
Processor
Recovery Augmentation Defense Augmentation
Distorted Resolve
Recovery Augmentation Max Shield Defense Augmentation DEF Max Shield Shield Recovery Modifier
Active Sets
Distorted Resolve
4/4
  • Assault Rifle Firearm ATK 5.6%[x] Submachine Gun Firearm ATK 5.6%[x]
  • Increases Skill Power by up to 14.3% based on HP lost relative to Max HP When current HP is 1, Skill Power 14.3% Recovers 15% Shield each time you debuff an enemy (Cooldown 15s) On Skill use, grants 1 stack of Exaltation (Up to 5 stacks, 15s duration) On Skill Attack at 5 stacks of Exaltation, fires a guided projectile toward the closest target (Cooldown 7s) Deals additional damage equal to 4.5%[x] of Skill Power, and inflicts Desolation on the hit target (Up to 5 stacks, 30s duration) Desolation: All ATK -0.5%[x]

Inversion Reinforcement

The best skills of this season

Misc

Fellow & Vehicle

Guide

How to play this build

(Lookup @MrStevieKeyz on X for the Build In Action - A Very Short Clip - Not PROMOTING MY X Account - I dont use youtube!)

First, the most important thing is having Explosive Aesthetics Trigger Mod (Finale in Gold is a must) if you have all gold even better. But this is mainly for deleting end game bosses in all end game content. The Abyss Challenge/Wall Crasher setup is similar to this, just need to tweak your Arche Board for Colossus Nodes and Reactor to Colossus/CD.

Requirements:
This build is pretty heavy in requirements but you CAN play around with it a bit.

  • You want 30K Max Shield to max out Explosive Aesthetics Trigger Mod Damage (Finale - must be gold stat).
    • I did this setup with no Max Shield on my A.Mod (24-25K Shield) and it still does insane damage, even after they fixed the bug with this mod. If you want to reach this number without Max Shield on your A.Mod, then take the Enhanced Shield Node (Purple - Bottom Center - Take the Left Node path)
  • Blue Beetle for Skill Critical Hit Rate 115%[x] (just a stat Stat Stick - do not fire with it and yes it will proc as soon as you use Skill 1.)
  • For cooldown you really need -87% CD minimum.
    • You can get away with -82% CD but you can feel the difference - even with inversion reinforcement cooldown.
  • Distorted Set is a must if you cannot reach 30K Shield, but if you have a good A.Mod with 200%-ish Shield you can actually switch to Slayer set for more damage, you would switch up your Arche Board to Enhanced Shield Purple Node (Bottom Center Take Shield nodes to the left NOT HP nodes to the right).
  • Make sure you roll your cores properly!
    • x2 Max HP X Cores on Components
    • x2 Max Shield X Cores On Components
      • This will you give you the most Shield possible.
  • Take note of the Inversion Reinforcement nodes used:
    • When triggering Finale on Trigger Mod it will consume/eat up your shield. This is why we use Distorted Set Bonus + Shield Reactivation in Inversion Reinforcement, this is the only way we can recover our shield by a large amount.
    • Grab Cooldown Node (a must)
    • 3rd you can play around with the last choice - but I'd go with Shield Particle Reconfig for more max shield.

Ammo Dog = Useless (not firing guns), HP Dog = Useless (using shields only), so make sure you pick MP Dog.

  • Ancestor Mod Should be 3-Up 1-Down:
    • Max Shield
    • Crit Damage
    • Fusion Power Boost Ratio
      • Harmless Negative
  • I currently only have Max Shield + Crit Damage, and this setup still destroys in Onslaught 3 and all other end game content.
  • If you happen to get Cooldown on your A.Mod then you can switch Reactors to Fusion/Crit Damage and/or drop the CD node in Arche Tuning, and/or Drop Focus on Fusion (this mod is literally doing nothing except giving us CD, it provides very little damage.)
  • Play around with it a bit, theres many ways to build this depending on your A.Mod.

I built this for mainly around grouping, and with all the Ines' running around you might not be able to do any real mobbing, but you will delete bosses and/or carry bad groups for mobbing as well.

For general mobbing rotation (running thru dungeons or easy mobs in Onslaught 3):

  • Skill 3 - (Shock Nuts) x1
  • Skill 2 - Overcharged Edge (Camouflage)
  • Skill 1 - Cutoff Beam (Detonate Explosive Aesthetics -  Bombs Fired per Stack)

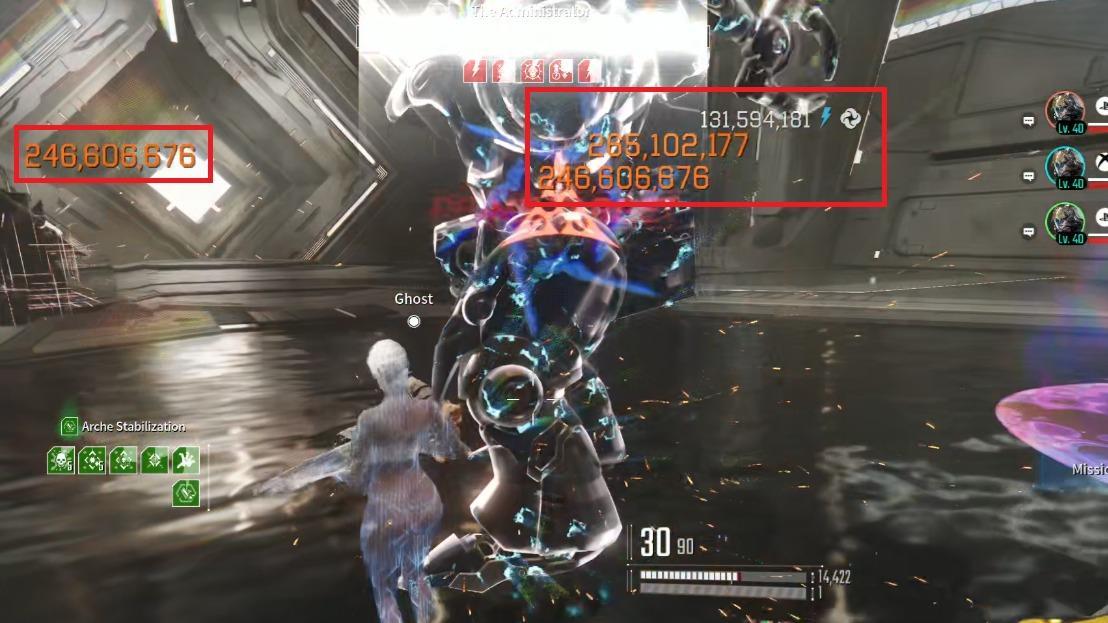
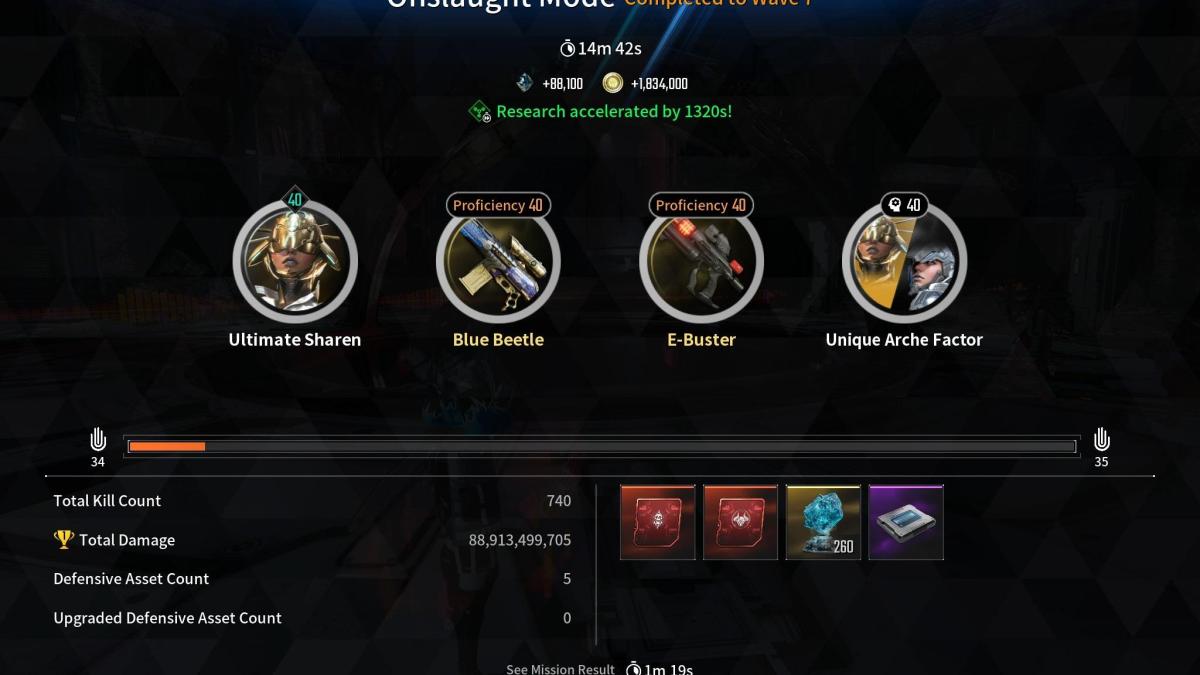
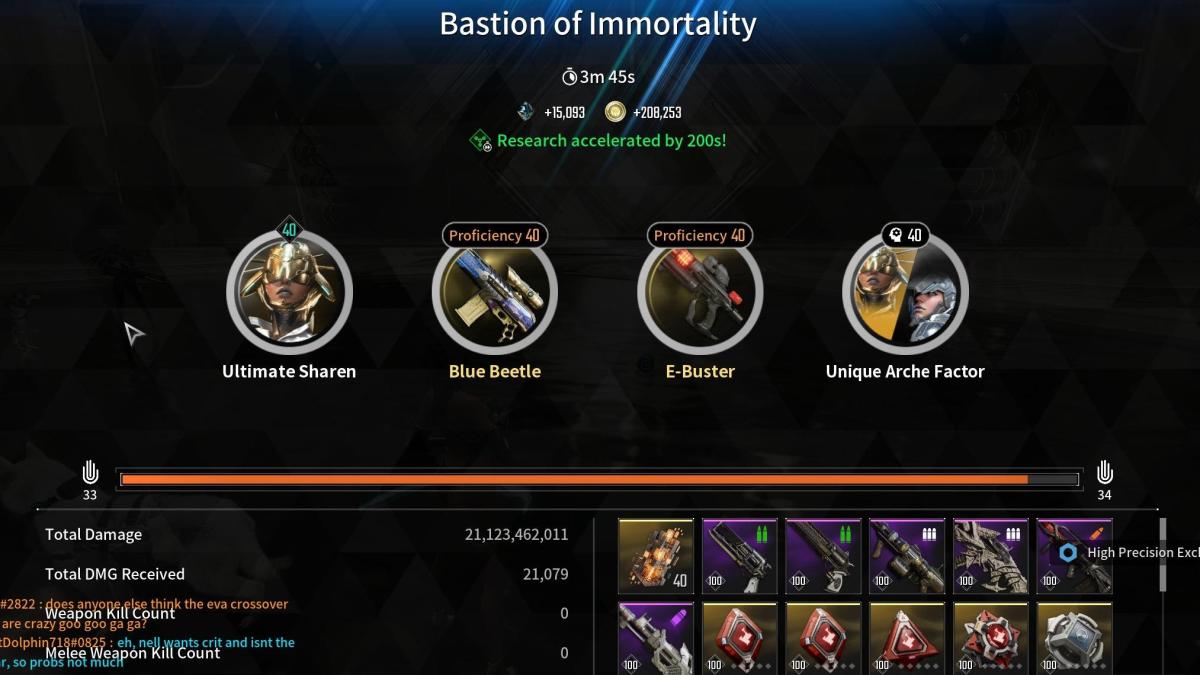
Usually there isn't enough time for Skill 2 during mobbing, so I'd recommend skipping skill 2 and just Do Skill 3 x1 (once), and then Skill 1 to trigger Bombs Fired per Stack. (Bastion of Immortality Dungeon & Onslaught is perfect for this build - See Attached Screenshots).

For Boss/Elite/Tyrant in EndGame Dungeons & Onslaught Mob rotation:

  • Skill 3 - x3 (Three Times!)
  • Skill 2 - Camouflage/Ambush CR Buff (A must!)
  • Skill 1 - Cutoff Beam (Results in a major explosion, from the screenshots you can see multiple 250M crits).
    • TIP: if you aim down on your mouse before Skill 1 - Sharen will only travel a very short distance!
    • Also, Do NOT hold Skill 2 down or you will teleport (unless thats your goal to do so.)

Now lets talk Critcal Hit Rate:

With the setup I provided you will be at 100% Skill Critical Hit Rate. 
The INFO page will NOT show 100% as it does not factor in Sharens Ambush 22%[+] Crit Rate.

  • Final Skill Critical Hit Rate Formula:
    • Sharens Base Critical Hit Rate: 20%
    • Ambush: 22%[+] 
    • Arche Tuning: 32%[x]
      • 26.4%
    • Arche Tuning + Blue Beetle Buff 115%[x] <-- Triggers on her Fusion Skill 1.
      • 49.4%
    • Base 20% + Ambush (Skill 2) 22% = 42%
    • 42% x ( 115%[x] Blue Beetle + 32%[x] Arche Tuning )
  • Final Crit Formula = (Base + Sharen Ambush) × (1 + total modifiers)
    • 42 * (1 + 1.15 + 0.32) = 103% Crit Rate (Overcapped)

Here's another way to look at it with the common Crit Mods usually used on Descendants and how easy it is to overcap yourself on Sharen:

  • Sharen Base CR: 20%
  • Sharen Ambushed CR: +22% <-- Remember DOES NOT show or factor in on the info page!
    • Total Base CR: 42%
  • Lets Pretend we were using the common Front Lines and Emergency Measures Setup:
    • Front Lines 27.7% + Emerg Measures 64.6% = 0.923 or 92.3%[x] Bonus (Multiplictive)
    • No Ambush = 20% * (1 + .923) = 38.46% CR
    • With Ambush = 42% * (1 + .923) = .8076 or 80.76% CR
  • Blue Beetle = +115%[x]
    42% * (1 + .923 + 1.15) = 129% CR (You are now WAY overcapped even without Arche Tuning Board!)

Screenshots

This build in action
Updated
steviekeyz
Build by steviekeyz